Setting static IP for Photon OS
Photon OS installs by default with DHCP enabled. This is perfect for building and distributing Photon OS OS as a Virtual Appliance, but for most practical applications, you’ll want to set a static IP address.
Changing the IP of Photon OS involves a newer, albeit standardized procedure of editing files located in: /etc/systemd/network that will be unfamiliar to many RHEL and Debian users.
I am going to begin in the VMRC of Photon OS, so I can set the IP without losing my SSH session. As soon as I have set the IP address, I am going to connect with SSH, which both confirms the success of my work, and will facilitate easier editing of the network properties.
Goals:
- Set a static IP address: 192.168.118.20/24
- Set a gateway: 192.168.118.1
1. To begin, open a VMRC to your Photon OS

2. Login with the user: root and the password you set (mine is: photon appliance)
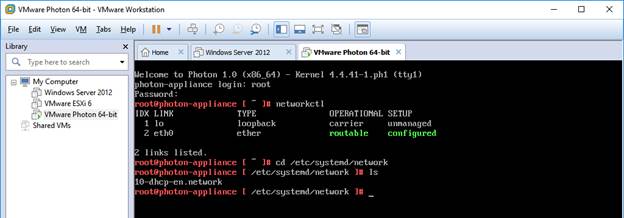
3. List your networking interfaces
networkctl

Take note of the device name. In this case, it’s eth0
4. change to /etc/systemd/network and list files
cd /etc/systemd/network
ls
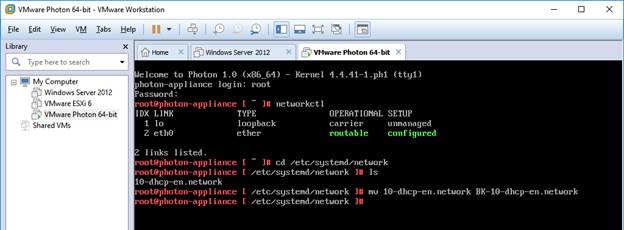
5. Move the DHCP configuration to a backup file
mv 10-dhcp-en.network BY-10-dhcp-en.network
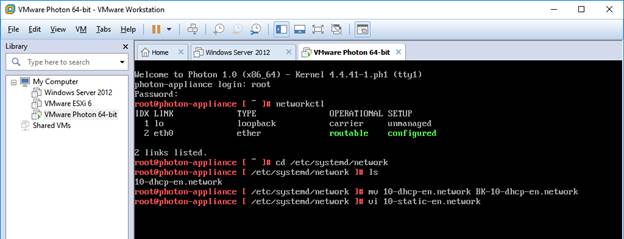
6. Create a new static configuration file
vi 10-static-en.network
7. Enter appropriate values for your network, save and quit
[Match]
Name=eth0
[Network]
Address=192.168.118.20/24
Gateway=192.168.118.1
8. List the files, with permissions
ls –la
Notice that the file we just made (as root), 10-static-en.network, has permissions only for the user and group (-rw-r—-), but no permissions for anyone else
| File (-) or directory (d) | User (rwx) | Group (rwx) | Other (rwx) | |
| – | rw- | r – – | – – – | 10-static-en.network |
9. Since system-network runs an an unique user, we need to make sure that user can read the file we just created by adding read ( r ) permissions for Other users
chmod o+r 10-static-en.network
ls –la
You can see that Other now has ( r ) permission
| File (-) or directory (d) | User (rwx) | Group (rwx) | Other (rwx) | |
| – | rw- | r – – | r – – | 10-static-en.network |
10. Now restart networking
systemctl restart systemd-networkd
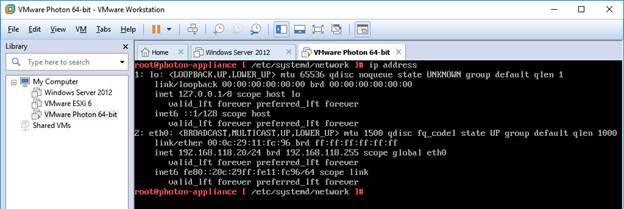
11. Run ip address to see if the address has applied
ip address
The IP address was successful
12. Now logon with SSH to be sure, provided you have enabled SSH access for Photon OS

13. Since this is the first time we are connecting to this IP, there will be a Security Alert.

14. Use the user: root and the password you assigned (mine is: photon appliance)


Hi,..nice article. But what are the commands to Save and Quit ?
[Esc] to leave editor mode
:w to write
:wq to write and quit at the same time
:q! to exit without saving changes
Very nice writeup.
Using an OS that you can load in < 1 minute is very attractive and I've been trying to use it.
Strangest issue with assigning an IP that I couldn't fix the other day; assigning DNS – tried to assign 1.1.1.1 and 8.8.8.8 but it still would not ping a non-ip.
anyway…
suggestion of a batch file that would assign fixed ip/dns, then enable ssh, and close the iptables to everything except http/https and a local ssh?
I’ll look into it. I can’t imagine why you couldn’t ping
Hi John,
Great article. For Windows guys like me with no vi skills easy way to bypass vi editor one-command example:
cat > /etc/systemd/network/10-static-en.network << "EOF"
[Match]
Name=eth0
[Network]
DHCP=no
Address=192.168.118.20/24
Gateway=192.168.118.1
DNS=192.168.118.1 8.8.8.8
EOF
chmod 644 /etc/systemd/network/10-static-en.network
systemctl restart systemd-networkd
BTW, "mv 10-dhcp-en.network BY-10-dhcp-en.network" is not needed. OS starts the network configuration files with the lowest priority filename, but'10-dhcp-en.network' will not overwrite eth0 from 10-static-en.network, just will setup DHCP for interface(s) with name e* not including eth0.
Regards,
Dominik
Thanks Dominik!
Thanks for the info, that was great